Wire Dog Cage Sample Quality Testing: 15-Point Inspection Checklist
Wire dog cage sample quality testing determines whether your sourcing investment pays off or becomes a costly mistake. Before diving into testing procedures, understand the sample fee structure and ROI framework to budget effectively.
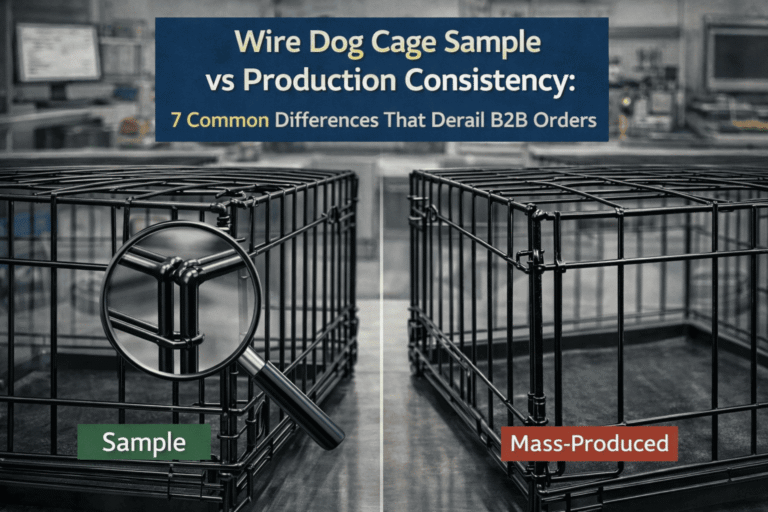
You just received a sample from your Chinese supplier—the finish looks clean, welds appear solid, and pricing seems competitive. However, here’s a critical question: How do you scientifically verify actual quality before committing to a bulk order?
Relying on “it looks sturdy” simply isn’t enough. Therefore, we’ve seen too many B2B buyers place orders for 5,000 units only to face customer complaints about welding failures after three months.
Peeling powder coating or cages that deform under normal use also cause problems. Moreover, the costs involve not just product returns and shipping fees—you lose customer trust and market reputation.
This comprehensive 15-point inspection framework helps you catch defects before they become customer complaints. As a manufacturer with 15 years of export experience, we’ll walk you through systematic testing procedures covering structural integrity, material durability, and safety verification.
Why Sample Testing Matters for Bulk Orders
✓ Quality Gap Risks
Sample quality often exceeds bulk production reality
✓ Failure Cases
Real-world defect examples and consequences
✓ ROI Analysis
Testing costs vs. potential losses comparison
The Cost of Inadequate Testing
In B2B procurement, systematic quality verification represents difference between profit and disaster. Consider a U.S. distributor who ordered 3,000 heavy-duty cages based on a polished sample.
After three months, customers reported: 17% of cages had welding point failures, 22% showed rust within 90 days, and 8% experienced door latch malfunctions. Consequently, the supplier claimed “normal wear,” but proper testing would have revealed these defects upfront.
The distributor lost $47,000 in returns and two key retail accounts. Therefore, quality testing eliminates three critical risks.
Three Critical Quality Testing Benefits
Risk Elimination
Many suppliers hand-pick premium units for samples while cutting corners during mass production—thinner wire gauges, fewer welding points, cheaper coating materials. Furthermore, hidden material defects, such as insufficient coating thickness or substandard steel grade, won’t surface until months of actual use.
Document Verification
Certification documents from “internal labs” often lack third-party verification, masking non-compliance with industry standards. The ROI is simple: Spend $200-500 testing one sample versus risking tens of thousands in bulk order failures.
Negotiation Leverage
Sample testing creates negotiation leverage. When you present documented defects—specific welding failures at positions A3 and B7, coating thickness measuring only 45μm versus claimed 60μm, rust spots appearing after just 48 hours of salt spray testing—you shift from subjective complaints to objective quality criteria.
Suppliers must either rectify these issues or adjust pricing to match actual specifications. Without testing data, you’re negotiating blind.
Standardized Testing Protocol
Moreover, establishing a standardized testing protocol protects your business across multiple suppliers. Once you’ve defined acceptance criteria—weld strength ≥18kg pull force for 4mm wire, coating thickness ≥60μm, no sharp edges detected by silk glove inspection—new suppliers must meet identical standards.
Your quality becomes transferable across your supply chain rather than dependent on individual supplier promises. Learn more about our manufacturing process and raw materials in our comprehensive guide.
The Bottom Line
Investing $200-500 in systematic sample testing prevents average losses of $15,000-50,000 in bulk order failures for B2B pet product importers. Quality testing isn’t optional expense—it’s essential risk management.
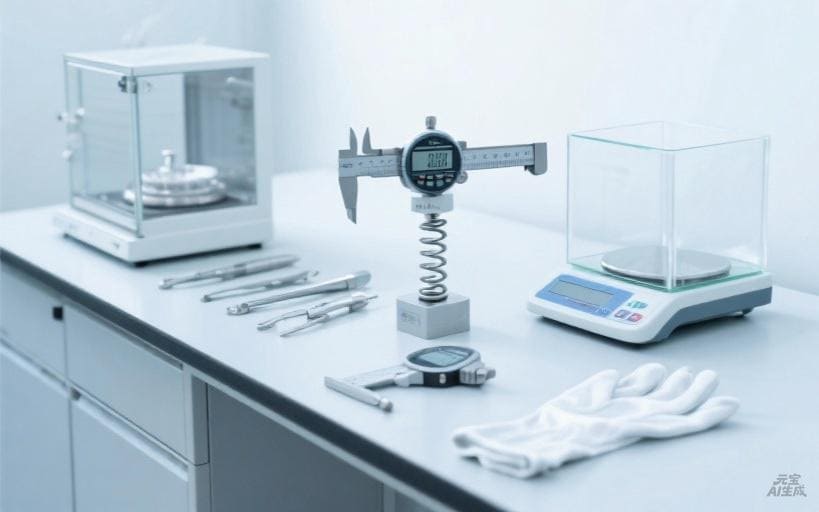
Essential Tools for Wire Dog Cage Sample Quality Testing
Effective quality testing doesn’t require a million-dollar laboratory. Here’s your essential toolkit for professional-grade accuracy:
| Tool | Purpose | Cost Range |
|---|---|---|
| Digital Caliper | Measure wire thickness, coating thickness, dimensional accuracy | $20-50 |
| Spring Dynamometer | Test welding point strength (0-50kg pull force) | $15-30 |
| Salt Spray Chamber | Corrosion resistance testing (accelerated aging simulation) | $80-150 |
| Digital Scale | Verify cage weight consistency (detect material shortcuts) | $25-40 |
| Silk Gloves | Sharp edge detection (snags indicate unsafe edges) | $10 |
Total professional investment: $150-280 for testing equipment covering 90% of quality requirements. For occasional buyers or smaller operations, substitute with everyday items: kitchen calipers instead of digital ones, luggage scales instead of dynamometers.
Manual saltwater spraying instead of automated chambers works too (less precise but functional). With budget alternatives, you can conduct effective quality testing for under $50.
Browse our standard crate programs to understand product specifications better. Tool selection depends on your testing frequency.
Importers placing monthly orders benefit from professional equipment—consistent measurements, documented results, and audit trails. In contrast, occasional buyers testing once or twice per year maximize value with budget alternatives.
Either approach, the critical requirement is method consistency: Use identical tools and procedures across all suppliers for comparable results.
Point 5-8: Structural Integrity Framework
- Welding Point Strength Testing – Apply perpendicular pull force to weld joints
- Cage Frame Stability Check – Apply lateral pressure simulating dog pushing
- Door Latch Durability Test – Open/close mechanism 500 times continuously
- Cage Dimension Accuracy – Verify manufacturing precision within ±2mm tolerance
Critical Focus: Structural failures account for 65% of cage-related customer returns.
Why Structural Integrity Matters
Structural integrity represents the most critical quality dimension—cages must withstand repeated stress without failure. First, welding points serve as the weakest link.
Each welding point should withstand specific pull forces based on wire thickness: 4mm wire requires ≥18kg, 5mm wire requires ≥22kg, and 6mm wire requires ≥26kg. Additionally, testing method involves using spring dynamometer perpendicular to weld direction, recording deformation force, and repeating at 10 random points.
Frame Stability Testing
Any weld failing below 80% of specified strength indicates substandard quality requiring supplier rectification. Therefore, frame stability testing simulates real-world conditions.
Apply lateral force: 25kg for 36-inch cages, 35kg for 48-inch cages. Then, measure frame deformation after 30 seconds—acceptable deformation is ≤3mm.
Door Latch Durability
Excessive flex indicates insufficient cross-bracing or inferior steel grade. Furthermore, for door latches, durability is paramount.
Open and close continuously 500 times monitoring for stiffness, misalignment, or spring fatigue. After testing, the latch must still engage smoothly without excessive force.
Dimensional Accuracy Requirements
Common failure points include weak spring mechanisms and misaligned latch plates. Moreover, dimensional accuracy affects stacking efficiency and shipping costs.
Measure length, width, and height at multiple points. Acceptable tolerance is ±2mm for all dimensions.
Check diagonal measurements for squareness—difference should be ≤3mm. Consequently, out-of-square cages create uneven weight distribution during shipping, increasing breakage risk.
Document all measurements with photos for supplier reference. Visit our blog for more quality assurance insights.
Point 9-11: Material Durability Verification
✓ Point 9: Wire Thickness
Verify actual vs. claimed gauge
✓ Point 10: Coating Thickness
Measure powder coating depth
✓ Point 11: Salt Spray Test
Accelerated aging simulation
✓ Additional Check: Adhesion
Cross-cut tape evaluation
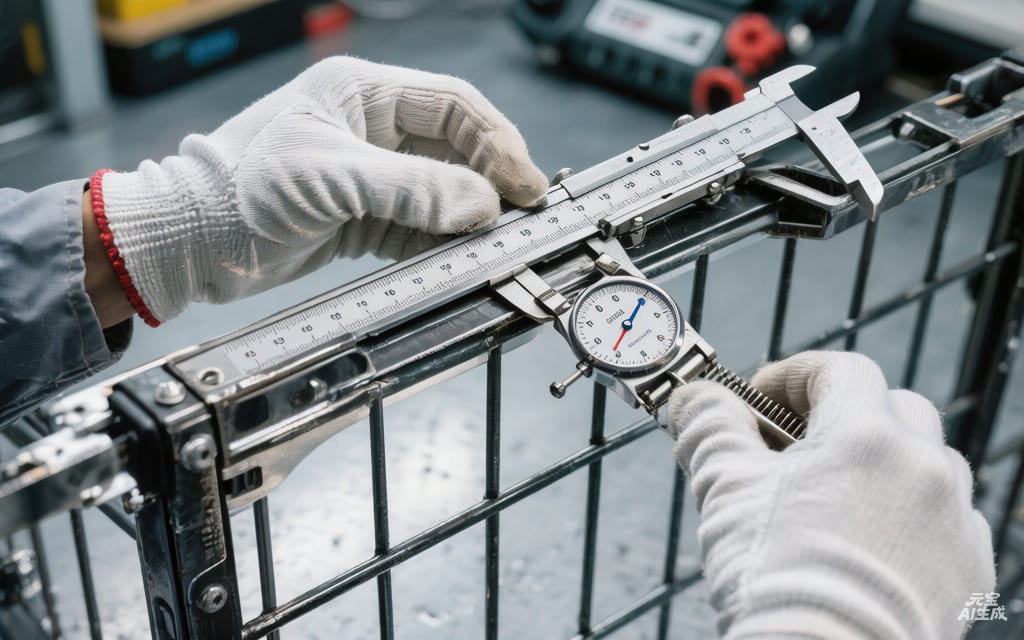
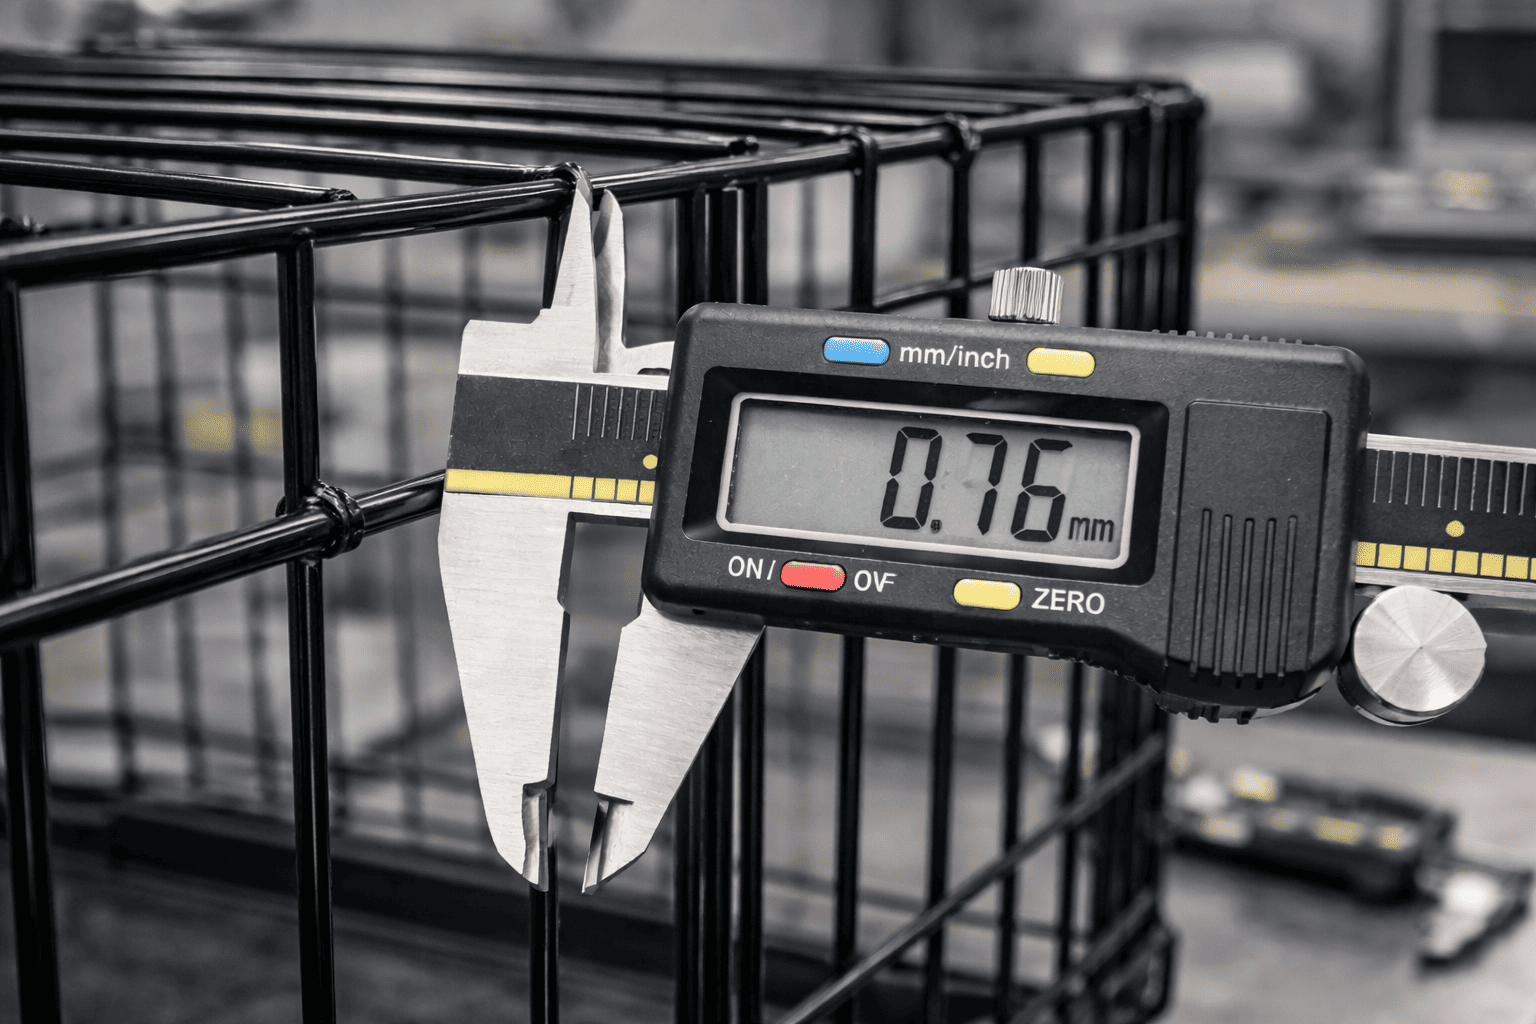
Wire Thickness Measurement
Suppliers often claim specifications they don’t actually deliver. Therefore, wire thickness measurement reveals material shortcuts.
Measure at 10 random locations using calipers and calculate average thickness. Tolerance of ±0.1mm is acceptable—for claimed 5mm wire, actual 4.9-5.1mm passes.
Real example: A buyer discovered their “5mm” wire actually measured 4.2mm—a 29% reduction in strength. This represents intentional material substitution violating quality specifications.
| Wire Thickness | Required Pull Strength | Acceptable Range |
|---|---|---|
| 4mm wire | ≥18kg pull force | 3.9-4.1mm actual measurement |
| 5mm wire | ≥22kg pull force | 4.9-5.1mm actual measurement |
| 6mm wire | ≥26kg pull force | 5.9-6.1mm actual measurement |
Coating Thickness Testing
Surface coating thickness determines rust resistance—critical for outdoor or humid climate use. Use magnetic coating thickness gauge measuring at 15 random points.
Standard requirement is ≥60μm (microns); minimum acceptable is ≥50μm. Coating below 50μm may rust within 6-12 months in normal humidity.
Request coating composition documentation—powder coating should be epoxy-polyester blend providing UV resistance for outdoor applications. Reference ASTM International standards for technical specifications.
Salt Spray Corrosion Testing
Salt spray corrosion testing accelerates years of exposure into days. Place cage in salt spray chamber with 5% NaCl solution at 35°C.
Duration options: 48 hours (equivalent to 1-2 years outdoor exposure) or 96 hours (equivalent to 3-5 years). Check coating surface for red rust.
Acceptance criteria: 48 hours—no rust allowed; 96 hours—red rust area ≤5%. For budget-conscious buyers, substitute with manual saltwater spraying (less precise but still revealing).
Document rust locations with photos and measure affected area percentage.

Pro Tip: Third-Party Verification
When budget permits, engage CNAS/CMA accredited laboratories for material composition analysis.
Steel spectrographic testing reveals actual grade and composition.
This verifies whether suppliers use specified high-carbon steel or cheaper low-carbon alternatives.
Cost: $100-200 per sample, potentially saving thousands in future returns.
Point 12-13: Safety Hazard Inspection
Safety hazards represent immediate product liability risks. Two critical inspections prevent injury to pets and owners.
Point 12: Sharp Edge Detection
Point 12: Sharp Edge Detection—Pets can injure themselves on rough metal edges, particularly at wire cut ends and welding joints. Testing method: Wear silk gloves and slide hands across all welding points and cut ends.
If gloves snag, edge is too sharp. Alternatively, run credit card along edges—if catches or scratches, edge requires deburring.
Document each sharp edge location with photos. Acceptable standard: zero detectable sharp edges after silk glove inspection.
Sharp Edge Defect Sources
Sharp edge defects originate from three manufacturing shortcuts: insufficient wire cutting deburring, rough welding spatter cleanup, and improper filing of cut ends. These are quality control failures—not design issues.
Suppliers must implement post-welding polishing and edge finishing procedures. Rejection criterion: Any detectable sharp edge requiring silk glove replacement due to snags.
For more safety standards, refer to EN Standards Database for EU requirements.
Point 13: Joint Gap Verification
Point 13: Joint Gap Verification—Avoid finger traps for pets. Measure all joint gaps between wires and between wire and frame.
Dangerous zone is 5-12mm gap size (can trap small paws or tails). Acceptable: gaps <5mm or >12mm.
Gap Measurement Process
Pay special attention to door frame gaps, bottom tray openings, and side wall wire intersections. Use gap gauge or caliper for precise measurement.
Joint gap design balances pet safety and structural requirements. Gaps <5mm prevent paw trapping but may interfere with airflow and visibility.
Gaps >12mm maximize ventilation but create entrapment risks. Target specification: 3-4mm for small animal cages, 15-20mm for large breed cages where paw size eliminates entrapment concern.
Documentation Requirements
Document gap measurements at multiple locations—top, middle, bottom sections. Furthermore, safety inspection documentation requires photographic evidence.
Take close-up photos of each joint gap with caliper showing measurement size. Photograph sharp edges identified during silk glove testing.
This creates irrefutable evidence during supplier negotiations—”Door frame gap at position D7 measures 8mm (dangerous zone), exceeds specification of <5mm." Supplier cannot dispute visual documentation.
Learn more about our quality control procedures on about our factory page.

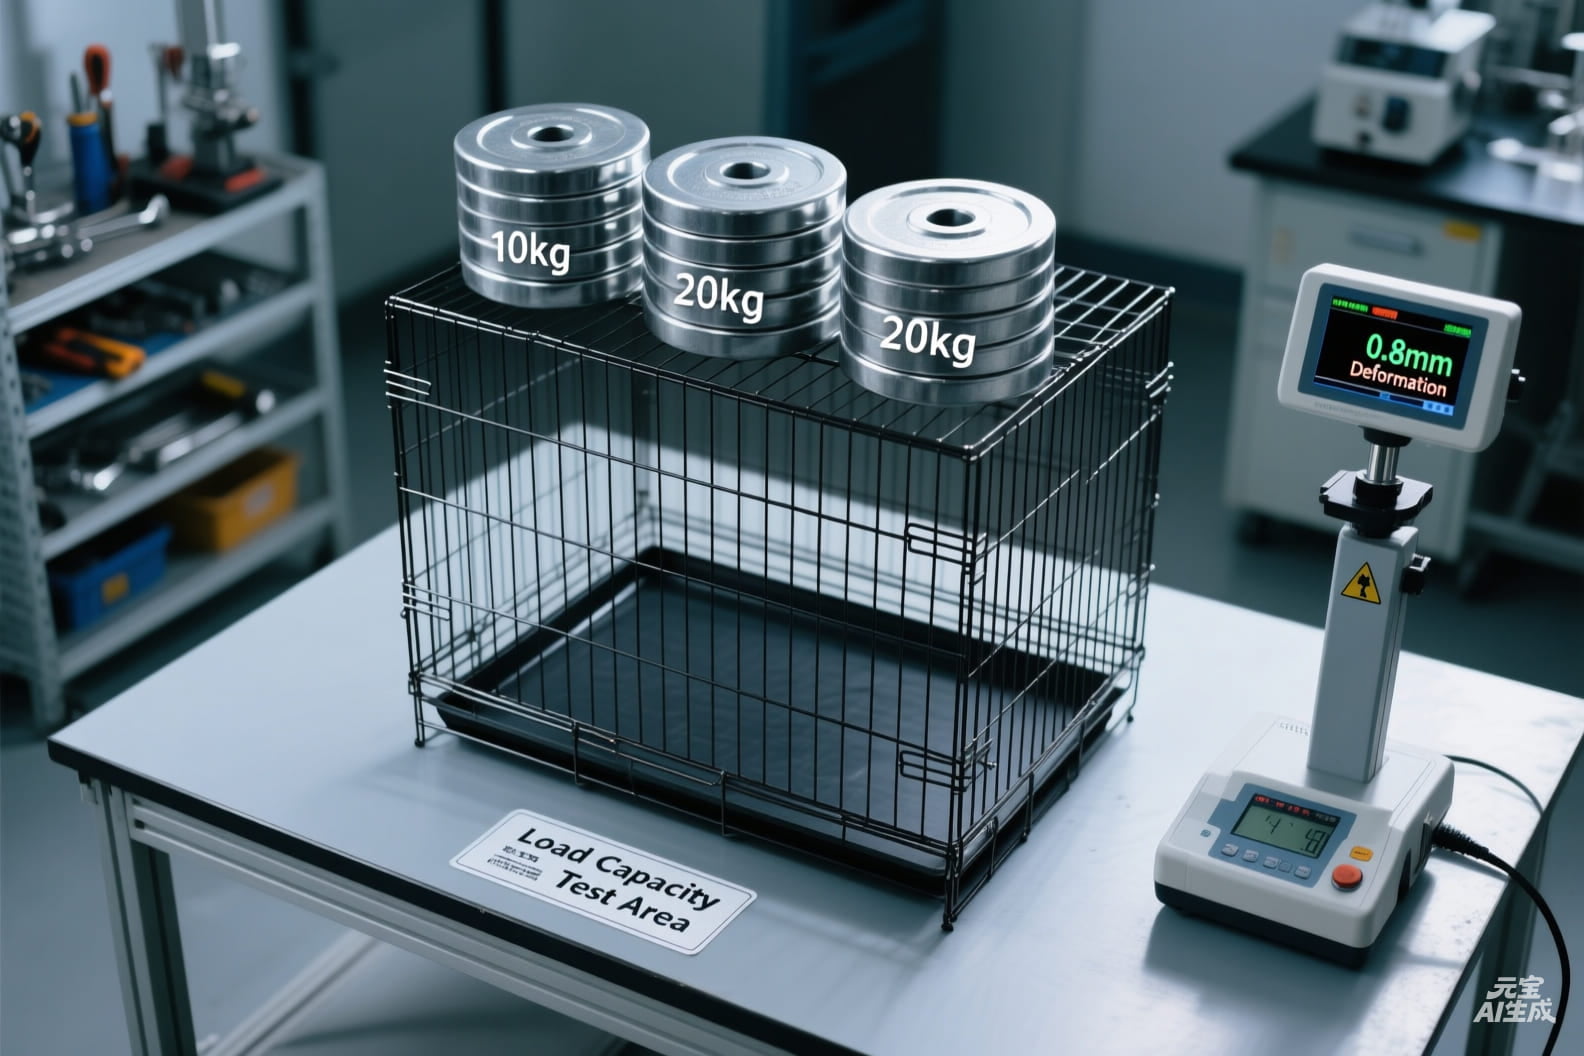
Point 14: Load Capacity Test
Real-world usage demands reliable strength under load. Testing combines static and dynamic load conditions.
Static Load Testing Procedure
Static Load Testing: Place 2× rated weight in cage (e.g., 100kg rated → test with 200kg). Maintain for 24 hours at room temperature.
Measure bottom wire deformation after 24 hours. Passing standard: deformation ≤5mm.
Dynamic Load Testing Method
This tests structural integrity under sustained load conditions—simulating large dogs sleeping or resting in cages for extended periods. Dynamic Load Testing: Drop 10kg weight from 30cm height onto cage bottom.
Repeat 3 times. Check for structural damage or permanent deformation.
This simulates pets jumping into cages from elevated surfaces. Pass criterion: no visible cracks, no permanent deformation >2mm, all joints remain secure.
72-Hour Continuous Monitoring
72-Hour Monitoring: Place rated weight (not 2×) and observe daily for 3 days. Progressive deformation indicates metal fatigue.
Acceptable cumulative deformation after 72 hours: ≤3mm. Record measurements at 0, 24, 48, and 72 hours.
Plot deformation curve—rapid initial deformation followed by stabilization indicates acceptable settling; continuous progressive deformation indicates structural weakness. Load testing reveals critical quality factors: actual wire strength (independent of claimed gauge), weld joint integrity under stress, and frame design effectiveness.
Load Testing Documentation
Document weight distribution (how weight is positioned), support points (cage resting on floor vs. elevated), and environmental conditions (temperature affects metal properties). Compare load test results across suppliers—superior performers show minimal deformation and consistent results across multiple samples.
Load Testing Red Flags
- Rapid deformation: Wire shows permanent deformation after minimal load exposure
- Uneven settling: Different cage areas deform inconsistently indicating weak spots
- Weld failures: Cracks appearing at weld joints during load testing
- Frame twisting: Cage loses squareness under load indicating insufficient cross-bracing
Point 15: Documentation Review
Technical documentation complements physical testing—paper trail reveals supplier credibility:
Third-Party Test Report
Third-Party Test Report: Must bear CNAS/CMA accreditation seals indicating laboratory certification. Check report date (within 6 months of sample shipment).
Product model must match sample specifications, and batch number must be traceable. Red flag: Reports from “internal labs” without third-party verification lack credibility and may be fabricated.
Compliance Certifications
Compliance Certifications: Verify ASTM F2057 (pet containment systems) and EN 71-3 (heavy metals migration) certificates. These address different markets—ASTM for North America, EN 71-3 for European Union.
Check certificate validity dates and ensure your target market requirements are covered. For UK market, additionally verify UKCA certification replacing CE after Brexit.
Material Specifications
Material Specifications: Request steel grade documentation (e.g., Q235, SAE 1018) and coating composition (epoxy-polyester blend). These confirm actual material quality versus generic claims.
Powder coating should include UV stabilizers for outdoor applications. Request SDS (Safety Data Sheet) for coating materials to verify absence of restricted substances like lead or cadmium.
Batch Traceability
Batch Traceability: Can supplier trace raw material batches? Critical for quality consistency across bulk orders.
Request: steel batch numbers, coating batch numbers, and production dates. Quality issues arising in bulk production require root cause analysis—traceability enables identifying affected batches for targeted recall rather than blanket rejection.
Supplier Transparency Assessment
Documentation audit assesses supplier transparency. Suppliers hesitant to provide detailed documents, offering generic certifications without batch numbers, represent immediate risks.
Those citing “trade secrets” to withhold material specifications also represent immediate risks. Reliable manufacturers maintain comprehensive documentation as quality management system requirement, not optional service.

Verification Action Step
Verification Action: Contact third-party laboratories listed on certificates to confirm authenticity. Many suppliers copy legitimate certification formats with fabricated content.
Email or call laboratory providing certificate number and date—legitimate labs can verify authenticity within 24 hours. Cost: negligible time investment preventing counterfeit certification acceptance.
Check our success cases to see how we work with quality-focused partners.
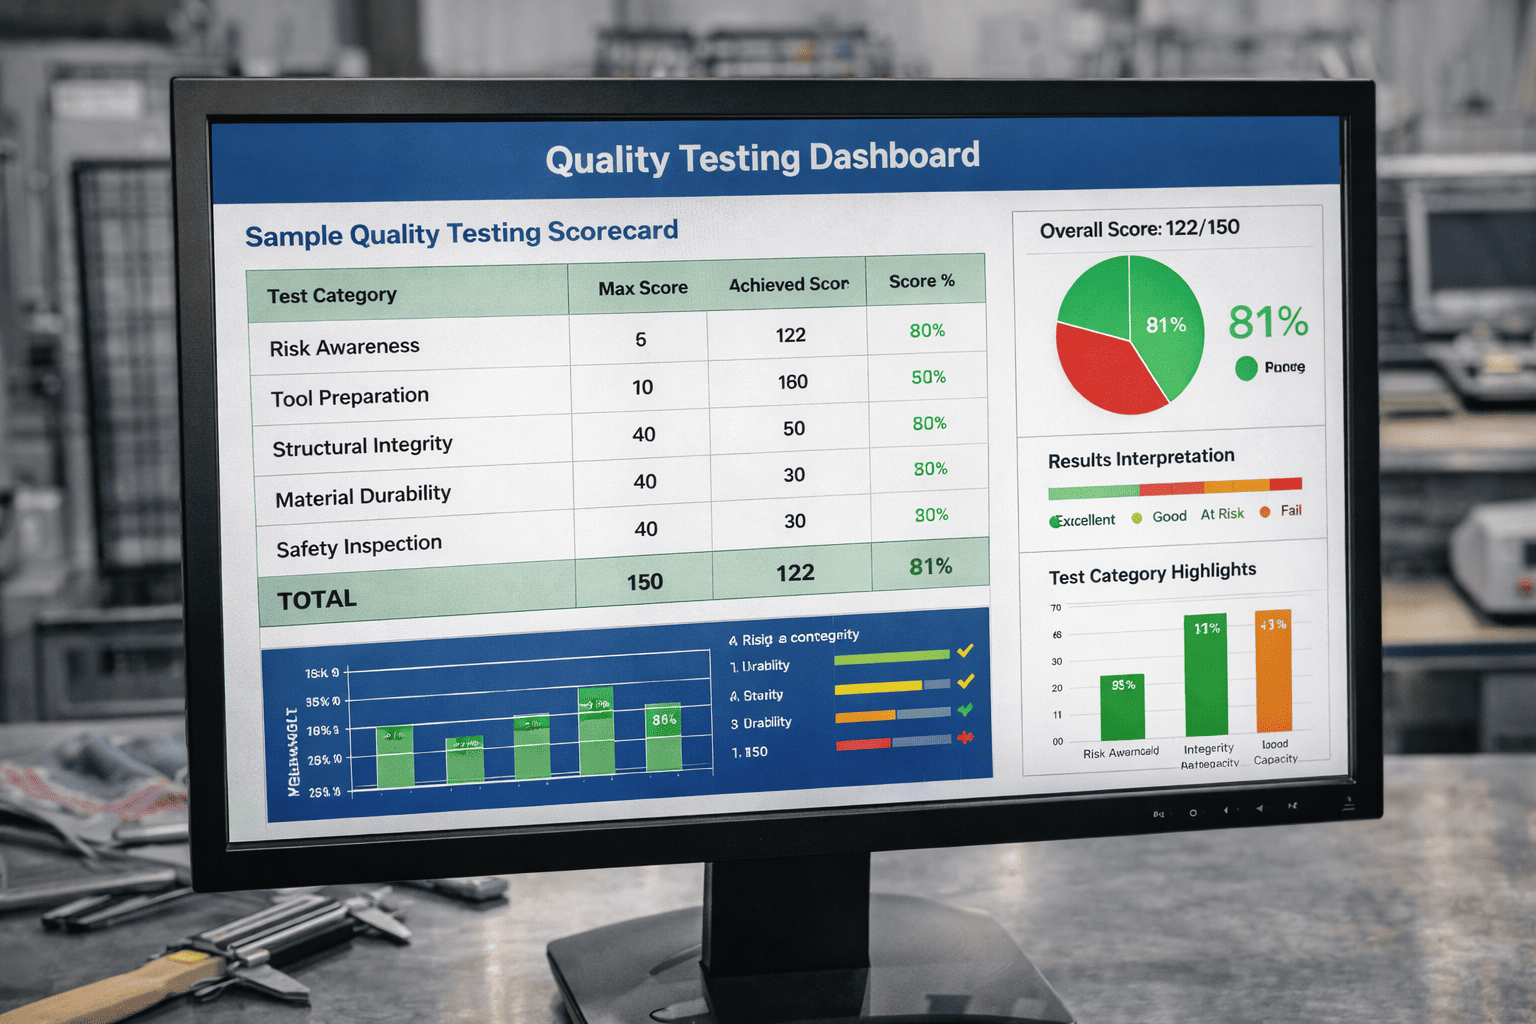
Interpreting Wire Dog Cage Sample Quality Testing Results
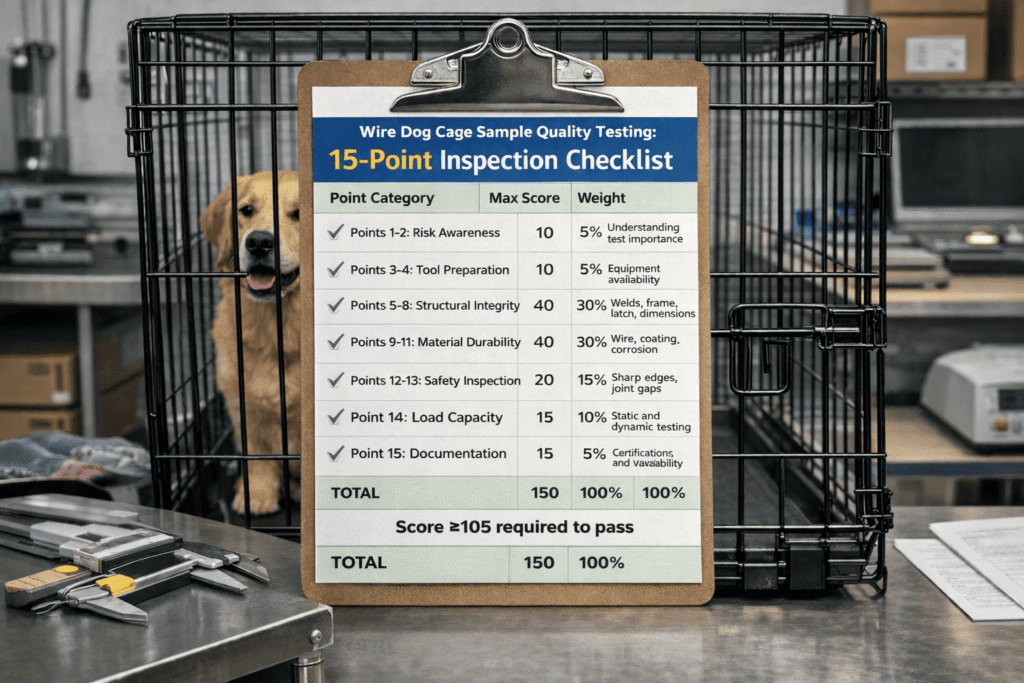
Completing 15-point inspection requires systematic result interpretation for decision-making. Use this scoring framework:
| Point Category | Max Score | Weight | Pass/Fail Criteria |
|---|---|---|---|
| Points 1-2: Risk Awareness | 10 | 5% | Understanding test importance |
| Points 3-4: Tool Preparation | 10 | 5% | Equipment availability |
| Points 5-8: Structural Integrity | 40 | 30% | Welds, frame, latch, dimensions |
| Points 9-11: Material Durability | 40 | 30% | Wire, coating, corrosion |
| Points 12-13: Safety Inspection | 20 | 15% | Sharp edges, joint gaps |
| Point 14: Load Capacity | 15 | 10% | Static and dynamic testing |
| Point 15: Documentation | 15 | 5% | Certifications and traceability |
| TOTAL | 150 | 100% | Score ≥105 required to pass |
Decision Framework
Decision Framework: Score ≥120 (80%)—approve for bulk order with standard QC plan. Score 105-119 (70-79%)—request supplier improvements, retest within 2 weeks.
Score <105—reject sample, either switch supplier or negotiate specification changes. Critical failure (any single safety issue or material substitution exceeding 10% tolerance)—immediate rejection regardless of total score.
When Testing Fails—Your Options
Option 1: Supplier Improvement
Option 1: Supplier Improvement—Send detailed failure report with photos/videos. Request specific corrective actions: “Welding points at positions A3, B7, C2 failed 18kg pull test showing 14kg, 13kg, 12kg respectively.”
“Coating thickness measured 42μm versus specified 60μm.” “Sharp edges detected at 7 locations identified in photos attached.”
Demand free replacement sample after improvements. Specify 14-day response deadline.
Negotiation Script Examples
Negotiation Script: “Your sample scored 82/150 on our quality testing protocol.” “Specifically, welding points at positions A3, B7, C2 failed 18kg pull test showing only 12-14kg strength.”
“Coating thickness measured 42μm versus 60μm specification.” “Sharp edges detected at 7 locations using silk glove inspection.”
“Please address these critical defects and resubmit within 14 days.” “We cannot proceed until these are resolved.”
Option 2: Specification Adjustment
Option 2: Specification Adjustment—If quality aligns with lower price point, request price reduction matching actual specifications. Example: “Sample shows 4.2mm wire versus specified 5mm.”
“This represents 29% material reduction.” “Either provide replacement with correct specifications or adjust unit pricing by 20% to reflect actual material cost.”
Update marketing materials accordingly to avoid misleading customers.
Option 3: Supplier Replacement
Option 3: Supplier Replacement—If supplier is unwilling or unable to fix issues, move to next pre-vetted supplier. Document failures for future reference—maintain supplier blacklist for critical issues.
These include counterfeit documentation, intentional material substitution, refusal to rectify safety hazards. Quality testing protects your business from problematic suppliers as much as it identifies quality defects.
Internal Report Template
Internal Report Template: Document all findings, attach photos of test results, and circulate to procurement, QA, and sales teams for alignment. Report sections: Executive Summary (score and decision), Detailed Findings (each test point with measurements and photos), Supplier Communication (correspondence and responses), and Action Plan (next steps and timelines).
This creates organizational memory for future sourcing decisions. Contact us through our inquiry page for professional support.
Data-Driven Decision Making
Systematic quality testing transforms procurement from subjective evaluation to data-driven decision making. Instead of “looks good,” you have precise measurements: weld strength 17kg/18kg requirement (94% pass rate), coating 58μm/60μm requirement (97% pass rate), zero sharp edges (100% pass), load deformation 4mm/5mm limit (80% pass).
These metrics enable supplier comparison, performance tracking, and continuous improvement across your supply chain.
Conclusion
Wire dog cage sample quality testing represents essential risk management for B2B pet product importers. This 15-point inspection framework covers structural integrity, material durability, safety hazards, load capacity, and documentation verification.
By following systematic testing procedures, you’ll catch defects before they become customer complaints, negotiate from knowledge rather than hope, and build supplier relationships based on transparency. Quality testing upfront saves money, protects your brand, and provides confidence in every purchase order.
Investment of $200-500 in sample testing prevents average losses of $15,000-50,000 from bulk order failures. Establish your testing protocol, document results consistently, and use data for supplier selection.
Your customers depend on quality products—ensure delivery through rigorous verification before committing to large orders. Ready to eliminate quality risks in your dog cage sourcing?
Contact us today for complete testing checklist PDF, free sample with video demonstration, or 1-on-1 quality engineering consultation. Serious buyers only—we focus on building long-term partnerships with quality-focused importers. For understanding sample-to-production consistency challenges, explore our sample vs production consistency guide. For comprehensive guidance on selecting manufacturers after quality testing, read our guide on choosing wire dog cage manufacturers for B2B buyers.
Ready for Quality-First Sourcing?
Download our complete 15-point inspection checklist, request free samples, or schedule quality engineering consultation.
Related Resources
- Cagesilo Home – Wire Dog Cage Specialists – We manufacture only wire dog cages and accept only serious buyers
- Traditional Crates Guide – Comprehensive coverage of raw materials, manufacturing processes, components, and pricing
- Standard Wire Crate Programs – Complete catalog of standard dog cage models
- Insights Blog – Collection of B2B sourcing and quality assurance articles
- About Our Factory – Manufacturing facility and quality control overview
- Success Cases – Real customer partnerships and project highlights
- Sample Negotiation Strategies – Psychology-based negotiation tactics for better supplier terms
- ASTM International – Official standards organization for technical specifications
- SGS Pet Product Testing – Global third-party testing and certification services
- Intertek Pet Products – Comprehensive pet product testing and certification solutions